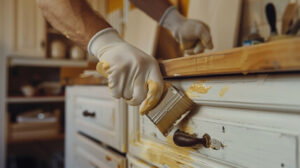
Cabinet refinishing is one way to give your cabinets a fresh new look. It involves staining or painting your existing cabinets with a new color.

It is a less expensive option than replacing the entire set of your cabinets. However, cabinet refinishing is time consuming and generates a lot of dust. Contact Painters Bradenton for professional help.
Cabinet refinishing is a great option for homeowners looking to give their kitchen a facelift without spending the time and money involved in a complete remodel. This process allows homeowners to choose from a variety of colors and finishes to ensure that their cabinets match the rest of the room’s decor. The preparation for cabinet refinishing is more extensive than that of a simple paint job, but the results are well worth the effort.
One of the first things that you need to do is prepare your cabinet doors for refinishing. You can do this by removing all of the hardware and hinges from your cabinet doors and then sanding down the surfaces. Next, you will need to clean the surface with a degreasing solution or dish soap so that any dirt or grease doesn’t interfere with the new finish. You should also make sure to label your cabinet doors so that you can put them back in the right place when you’re finished.
Then it’s time to strip the existing stain or paint from your cabinet doors. This can be done with a chemical stripper or lots of sanding, but the key is to get down to bare wood before starting. This will allow your new finish to adhere much better. If you’re going from a light color to a dark color, this is generally easier than doing the opposite.
While refinishing provides a quick visual update, it’s important to understand that it won’t last as long as a full cabinet replacement or even refacing. This is because refinishing doesn’t address any structural damage or other issues that you might have. Also, most paint products aren’t designed to withstand the constant contact that your cabinet doors will have with moisture and grease on a daily basis.
This is why it’s a good idea to think carefully about what you want your cabinet finish to look like and how often you plan to use your kitchen before you decide to go ahead and refinish or reface them. If you do decide to refinish your cabinets, remember that you won’t be able to change the style of the doors or drawer fronts, so think carefully about the options available to you before you start.
Stripping
Cabinet refacing involves replacing cabinet doors and drawer fronts while keeping the existing cabinet boxes. Cabinet refacing requires more extensive work than refinishing and can cost significantly more, depending on your options and the quality of your materials. Refacing is typically more durable than refinishing but may not last as long, as refaced cabinets are exposed to more wear and tear than the original wood.
During refacing, cabinet doors and drawer fronts are custom-made to match the size of your current openings. This ensures a seamless look, but it also means that your new cabinet doors and drawer fronts will not match the color of your old ones. Because refacing utilizes different manufacturers’ products, it can result in inconsistent wood tones that can make your kitchen look chaotic and out of place.
The process of refacing typically begins with sanding the surfaces of your cabinet boxes. This can be done by hand or with an electric sander, and may require the use of chemical strippers for painted surfaces that have been previously refinished. After sanding, the cabinet boxes are ready for the new veneers to be attached. The new door and drawer fronts are then installed on the cabinet box. Any imperfections are repaired before painting the cabinet box and doors to create a uniform appearance.
Refinishing can be a great alternative to refacing or replacement, and is usually less expensive than new cabinetry. However, it is not suitable for every type of cabinet. Typically, only wooden cabinets can be refinished, and it is not possible to stain laminate or thermofoil. Refinishing can be a DIY project, but it is time consuming and labor intensive. In addition, homeowners that refinish their own cabinets should be prepared for a lot of mess and odor. If you don’t want to deal with these issues, you should have a professional refinish your cabinetry. NHance’s Color Shift is an alternative to refinishing that is similar but less labor intensive. This service includes a similar cleaning and sanding process followed by the application of several coats of hand-applied paint that “shift” your cabinet colors to a more desirable hue.
Painting
Refinishing cabinet doors and drawer fronts can be a time-consuming and messy project. But it can be done with good results if you follow some basic steps. It is also important to use high-quality paint and materials to ensure a long-lasting, durable finish.
Cabinet refinishing is different from cabinet refacing, in that it involves keeping the existing cabinet doors and drawer fronts and painting them rather than replacing them with new ones. It can be a cost-efficient way to refresh your kitchen, but it doesn’t provide the same durability as refacing would. The doors will still experience a lot of wear and tear, including heat, steam, and condensation.
Before beginning the refinishing process, it is necessary to thoroughly clean the surfaces of your cabinets to remove any dirt and grease build-up. A degreaser can be helpful for this, as it will cut through kitchen grime to give your paint a clean surface to adhere to. Once the cabinets are cleaned, they should be lightly scuffed sanded to roughen up the surfaces a little – not enough to remove all the sheen, but enough to create a bit more of an adhesion-promoting profile. This step can be done with a coarse grit sandpaper, such as 100 or 150-grit.
Once the sanding is complete, the cabinets should be primed and allowed to dry completely. It is essential to properly prepare your cabinets for painting, as this will affect how the finished product looks and performs. Using a kilz oil-based primer is a great choice as it will help the new paint to adhere and protect the wood from moisture and heat. You will need to carefully follow the instructions on your primer, as each one will vary slightly.
Remember, refinishing can only be done on wood or medium-density fiberboard (MDF) cabinet doors and drawer fronts. It will not work on thermofoil or laminate, as these doors do not allow for sanding and will not accept paint well. Once the primer has dried, you can begin to paint your cabinet doors and drawer fronts. It is best to do this outside, if possible, as it can be messy and will produce a fair amount of fumes. It is also a good idea to use a mask, as the smell can be quite intense.
Finishing
The final step in the cabinet refinishing process involves applying a new coat of stain or paint to the cabinets. Most professionals use an oil-based primer prior to the first application of either finish, which helps ensure that any previous stains or damage won’t show through after the new coat is applied. Once the primer has dried, sanding is done with medium grit sandpaper and then smoothed out by hand or power sander. After the final sanding, a damp cloth is used to remove any remaining dust and dirt. The cabinet doors can then be wiped down and then cleaned with a mild cleanser or a degreaser to ensure they’re ready for the new finish.
Once everything is clean and ready to be finished, the doors and drawer fronts are re-installed along with any hardware. A final coat of polyurethane or lacquer can be added to the cabinets if desired, which will protect the finish and give it a nice sheen. Once the finish is dry, it’s time to enjoy your new kitchen!
Cabinet refinishing is a great way to update the look of your kitchen without the cost and inconvenience of replacement. However, it’s important to consider your options carefully before committing to this project. If your existing cabinets have significant damage or are not structurally sound, they may not be suitable for refinishing. Also, refinishing is not an option for cabinets that have already been painted and cannot be stripped.
It’s also worth noting that refinishing isn’t the best choice for homeowners who want to make major style changes to their cabinets. If you’re looking to change the color from light to dark, this is possible, but if you want to re-stylize your cabinets by changing the style of the doors, refacing is a better option.
