Home Services

How to Go About Painting New Drywall

Painting New Drywall may need to be painted for several reasons; whether you just moved in, did some renovations, or are replacing damaged areas of the wall. Regardless of the reason, it is imperative that the walls are properly sanded and primed before painting.

This will help to ensure that your paint job is even and that the color lasts. Proper prep will also reduce issues that come with the porous nature of drywall.
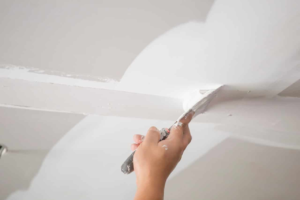
Drywall sanding is a major step that often gets overlooked when painting a room, but it’s essential to getting a quality paint job. Drywall sanding smooths out the taped seams, fills in holes and nail gouges, and helps create an even surface to apply primer and paint. To sand correctly, you’ll need a good quality sander, a sanding sponge and some high-quality sandpaper in varying grits. In addition, you’ll want a double-strap dust mask to protect yourself from inhaling drywall particles and some form of eye protection, such as safety glasses or a face shield.

There are two different types of sanding methods for drywall—dry and wet. Choosing wet sanding adds a moisture component to the process, which softens the compound and helps reduce grittiness. However, wet sanding takes longer and may not result in as smooth of a finish as dry sanding.

If you do choose to wet sand, always follow the manufacturer’s instructions on the product you’re using. If you use too much water, the mud could become waterlogged and lose its effectiveness. Additionally, too much water can lead to a softened surface that’s more difficult to work with, and can also cause a “rainbow” effect in the finish when it’s dried.

Aside from being messy and time-consuming, sanding drywall can be dangerous for those who aren’t properly prepared. For example, if you’re sanding while the mud is still wet, you could ruin the surface of the wall by leaving ridges that will be visible under light. Additionally, sanding too hard could tear the paper covering that covers the gypsum inside and shorten the lifespan of the drywall.

Lastly, if you’re working on your own, it’s important to take your time when sanding. It’s easy to get rushed and end up with an uneven finish. Instead, be patient and make sure you’re using the right sander for the task at hand. The key to a successful sand is going over every inch of the wall and working in consistent, circular motions. This will help prevent sanding lines that will show through once everything is painted.

Primer

Once the drywall is clean, any necessary repairs are made and the sanding process is completed, it’s time to apply primer. This is an important step that allows the wall to properly lock in paint and set up for long-lasting results. It also helps to reduce the amount of paint that is required to cover the surface.

There are several different types of primer, but it is best to select one that is specifically formulated for use on drywall. This will ensure that the primer is safe to use in your painting environment, and will provide a good foundation for your new paint job.

After applying the primer, allow it to dry for a few hours before moving on to the color coat. It is also a good idea to wipe down the walls to make sure there are no loose crumbs or dust that could interfere with the quality of your finished product.

Drywall is a very porous material. The gypsum and paper components of drywall are naturally absorbent, which makes it difficult for paint to adhere to the surface. A quick sand and application of a specialized drywall primer can help ensure that paint will not only stick, but will be able to stay in place and stand up to the test of time.

A high-quality drywall primer can help to ensure that your paint project will go off without a hitch and will look professional for years to come. It can help to eliminate the need for many extra coats of paint, as well as minimize the need for paint thickeners.

Once you’ve chosen your primer, be sure to follow the manufacturer’s instructions on how to apply it. A good rule of thumb is to apply the primer in a v or w pattern, starting at the top of the wall and working down toward the bottom. After the primer has dried, it is a good idea to lightly sand it again with a pole sander and then wipe down the walls once more to remove any remaining dust from the surfaces of the drywall.

Paint

When painting new drywall, it’s important to follow all of the necessary steps to ensure that you get an even coat of paint with no streaks or drips. It’s also important to make sure that you allow each coat of paint to dry fully before applying the next. A minimum of two to four hours should be allowed for each coat to dry.

Using the right painting techniques can also help you achieve an even coat of paint. For example, rolling the paint in a “W” pattern will reduce the appearance of roller marks and give you an even distribution of paint from edge to edge. It’s also a good idea to apply multiple thin coats of paint rather than a single thick one.

It’s common to cut corners when it comes to home renovation projects in order to save money and time. However, skipping steps or using low-quality materials can negatively impact the final result of your project. This is especially true when it comes to interior painting, where the quality of your paint job can significantly influence the overall look and feel of your newly redesigned space.

One of the most common mistakes that homeowners make when painting their own homes is skipping the primer step. While bare, new drywall may not seem like it needs a primer, it’s actually a very porous surface that can cause the first coat of paint to crack or peel.

The best way to prevent this from happening is to use a high-quality drywall primer, such as Sherwin Williams’ Special Drywall Primer. This will seal the drywall and mud, making it much more receptive to new paint.

Once you’ve applied a few coats of drywall primer, you can start thinking about the paint color options for your new redesigned space. Keep in mind that different types of paint have varying levels of hiding power, color vibrancy and durability. These factors can be influenced by the pigment volume concentration (PVC), binder content, and additives.

For example, a higher PVC will produce a paint that hides well but won’t hold up to stains or scratches as well as a lower PVC. Other additives can include fungicides and algaecides to protect the paint finish from microorganisms, driers to make the paint dry faster, and thickening agents to minimize shaking and stirring.

Finishing

If you’re a homeowner who’s trying to tackle a drywall painting project on your own, it’s important to remember that this is a process that requires patience and attention to detail. If you’re rushed or skip any steps, it could lead to an uneven paint job that doesn’t stand up over time. This can ultimately ruin the look of your room, so it’s best to take the time to follow these simple steps to ensure that your drywall paint jobs go smoothly and turn out professional.

Before you begin painting, make sure that your drywall is fully dried, and then lightly sand it. It’s also a good idea to wipe the wall down with a damp cloth, as this will help to remove any dust that may have settled on the surface of the drywall.

Once the sanding is done, apply a thin coat of drywall primer. This will give the drywall a smooth finish, and will help to protect it from moisture. You can use a roller, brush or sprayer to apply the primer. Most projects will require a minimum of two coats, but feel free to add more if needed.

Afterwards, wait for the primer to dry completely. Then, you can begin painting the new drywall. Be sure to use a high-quality, moisture-resistant paint, and to sand it meticulously after each coat. If you want to achieve a sleek, modern look in your space, consider using a gloss paint instead of a traditional matte or flat finish. This will give your walls a luxurious shine that’s easy to clean, and will provide a lasting, durable finish.

When you’re finished painting, be sure to remove all of the drop cloths and painter’s tape, and then clean up any debris that may have accumulated from the painting process. Once the paint is dry, you can replace any furniture that was removed from the space, and enjoy your new, professionally painted drywall! If you’re looking for a team of experts to handle your next painting project, contact the experts at Pro Paint and Finish. We can provide you with a fast, professional service that will leave your new drywall looking great!

Home Services

Drain Cleaning Basics

Drain Cleaning Aurora, CO is vital in keeping a home’s plumbing system functional and promoting a healthy living environment. It involves clearing clogged pipes to prevent waste from backing into the plumbing system.

Several drain cleaning methods are available. One is to use a combination of baking soda and vinegar. This is effective for mild clogs and has a pleasant citrus smell.

When a plunger, plumbing snake, or chemical drain cleaners fail to work, it may be time for more drastic action. The best solution is hydrojetting, a method that uses pressurized water to wash away clogs and remove debris from pipes. It is also effective in eliminating overgrown tree roots that infiltrate sewer lines. This is a highly efficient process that requires no excavation or digging to complete.

Professional plumbers use specialized jetting equipment to blast away clogs and wash away collected debris in your home or business’s drains and sewer line. This technology shoots water at high-pressure levels of up to 35,000 psi, which is enough to cut through most obstructions and break apart stubborn blockages. It can also cut through sludge, grease, soap scum, minerals, and food residues. It is more effective at removing debris than snaking and can be used on a wider range of materials.

The plumber first inserts a durable hose downstream into the plumbing line and attaches it to a water tank that’s pressurized to the right level. Then, the plumber turns on the water and sends it through the hose. The pressure is strong enough to wash away sludge, dissolve clogs, and break up overgrown tree roots. The resulting debris gets flushed down the drains and into the sewer line, where gravity takes over.

In addition to addressing clogs, the hydrojetting process can also be used for general maintenance and to scour the inside of pipes. It’s a quick and cost-effective way to get your home or business plumbing back into tip-top shape.

Before plumbers use hydrojetting, they will conduct a video inspection of your plumbing system to determine whether the pipes can withstand the intense water pressure. Older or damaged pipes may not be able to hold up to the pressure, and they can crack or break under the force of the water. If this is the case, the plumber will use an auger instead of hydrojetting. However, the abrasive nature of this cleaning technique can still be very effective in breaking down and washing away some types of blockages.

Drain snaking

Drain snaking involves inserting a long metal rod with a hook-shaped end into a blocked drain. A manual or motorized auger is used to rotate the rod and catch, break, or disintegrate the clog. The auger head also has a latching function for hard-to-reach objects, like clumps of hair or other solid debris. Once the clog is broken up or entangled, the rod is pulled out of the pipe. Depending on the type of drain snake and the size of the clog, this may take several attempts. After the clog is removed, it is recommended to flush the pipes with water to test for full functionality.

A professional plumber is best suited for drain cleaning as they have tools and knowledge of how to use them properly. Professionals also know how to identify and address underlying issues, which can prevent future clogs. In addition, they can offer tips for avoiding future blockages, such as installing a grease trap or throwing away large food scraps rather than putting them down the drain.

In the event of a serious clog, it is important to call a plumber as soon as possible to avoid potential damage. Some clogs are too severe for DIY solutions, and store-bought chemical cleaners may not fully dissolve or break up a large blockage. Additionally, some clogs occur deep in the drain pipes or toilet, which requires professional equipment to access and clear.

If you’re facing a minor clog, you can try to clear it with your own hand snake or a simple tool such as a bent wire coat hanger. To begin, disassemble a coat hanger and create a long, straight strip with the hook shape at one end. Push the hooked end into the drain opening and crank or turn the handle to feed it slowly into the pipe.

Once you reach the clog, rotate and advance the snake gradually until you feel it hook or disintegrate it. Be careful not to apply excessive force, as doing so can damage the snake or pipe. As you reach the clog, it’s likely that it will become stuck on or entangled in the snake’s coil.

Chemical drain cleaners

Chemical drain cleaners are liquid, gel or powder products that claim to dissolve blockages in your plumbing. They are readily available in hardware, home improvement and big box stores and are marketed as easy-to-use and effective solutions for stubborn clogs. These cleaners are based on chemical reactions that produce heat or gas and disintegrate the organic material in the clog. Despite their popularity, they should be used sparingly and as a last resort. The chemicals can damage your pipes and are harmful to the environment. They also don’t address the root cause of the clog, so they are only a temporary solution.

The primary ingredient in most chemical drain cleaners is acid. It’s the same substance that makes lye work to create soap, and it’s what burns away fats and dissolves grease clogs. These cleaners are effective because they donate or absorb electrons to and from the clog material, which breaks down its molecules and turns it into a watery solution that can be easily flushed from your pipes.

Most chemical drain cleaners are also toxic to people and pets. They release harsh fumes that irritate the nose, eyes and skin. If your space doesn’t have enough ventilation, these cleaners can also affect your indoor air quality (IAQ). Some of them are also dangerous to touch and may cause chemical burns if they come into contact with your skin or if you inhale them.

Another concern with chemical drain cleaners is that they often don’t reach clogs far from the pipe opening. This is because most of them are based on chemical reactions that only break down materials within a certain range of pH levels.

For example, the acid in sulfuric and hydrochloric chemical drain cleaners can melt PVC pipes and worsen corrosion in iron or copper pipes. They are also dangerous to septic systems because they kill the bacteria that process waste and contaminate the soil around the plumbing system. For these reasons, you should avoid using chemical drain cleaners unless they are specifically recommended by a professional plumber. Instead, call a professional who can use mechanical tools to remove the clog and inspect your pipes for the root cause of the problem.

Plumber’s snake

The plumber’s snake (also called a drain auger) is one of the most important tools in the plumbing professional’s arsenal. It consists of small metal blades attached to a long cable, which can be inserted into the pipes to break up and cut through clogs. The snake can also be used to clear out stubborn obstructions like hair and toilet paper. It is a quick solution for clogged drains, but it is not a permanent fix. Leftover debris can build up over time and cause future clogs.

You should never use too much force when using a plumber’s snake, as this can damage the pipe or sewer lines. Also, be careful not to poke into the wall of your house, as this can lead to a major plumbing problem. The best way to avoid this is by preventing blockages in the first place.

Before using the snake, prepare the area by removing any sludge or food residue from the sink or drain. It is also a good idea to remove the p-trap (the curved piping under the sink) so that you can reach the actual pipe directly. This will make snaking easier.

Once the snake is in the clogged pipe, slowly rotate and maneuver it against the clog to break up or entangle it. If the clog is particularly stubborn, it may be necessary to use more force. Always be careful when handling the snake, as it can be slippery and dangerous.

After you have successfully removed the clog, be sure to clean the snake with hot water and soap. This will help to prevent bacteria-laden waste from re-forming on the spring or along the cable. It is also a good idea to replace the spring and the end of the cable, which can easily become brittle over time.

To keep your drains clear, put strainers or screens over all the drains in your home. This will catch larger food scraps and other debris and prevent them from washing down the drains. In addition, always dispose of grease and oils in a separate container instead of pouring them down the drains. You should also install a grease trap to prevent fats from building up in your pipes.

Home Services

Grease Trap – The Unsung Hero of Commercial Kitchens

Grease Trap Perth reduces fats, oils, and grease (FOG) from entering the sewer system by intercepting them before they reach drain pipes. Without regular cleaning, the trapped waste builds up and can cause clogs and overflows.

Businesses that produce high volumes of FOG must install a grease trap or interceptor. Regular maintenance and cleaning are essential to comply with regulations and protect staff and customers from environmental contamination.

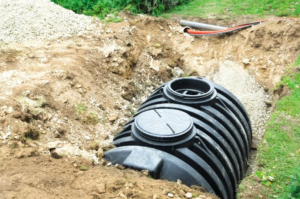
A grease trap is a plumbing device that filters fats, oils, and grease (FOG) from wastewater before it enters the main sewer system. Located outside or in the basement of commercial kitchens, these devices prevent FOG from traveling into sewer pipes and creating clogs. Local governments often mandate their use and inspect them regularly to ensure businesses are maintaining them properly.

Several types of grease traps are available, including traditional passive systems, hydro-mechanical units and interceptors. Each type works slightly differently, but all serve the same basic purpose.

The traditional grease trap is a large metal container that can be placed beneath sinks or in the basement of a restaurant. It has an inlet pipe that connects to the sink drain and an outlet pipe that vents to the outside. The wastewater that drains from the sink into the trap is cooled by baffles inside the trap, which allows the grease to separate from the water. The grease and oil float to the top, while the solid food particles sink to the bottom of the trap. The clear wastewater exits through an outlet pipe.

As the solids accumulate in the trap, they can block the inlet and outlet pipes, causing wastewater to back up into restaurants and kitchens. The trap must be cleaned / pumped out on a regular basis to remove the build-up.

Another type of grease trap is the hydro-mechanical grease interceptor, which uses a different system to filter wastewater. It has a series of pumps, motors and other components to process wastewater. These devices are more expensive than traditional grease traps, but they require less maintenance and can last up to 20 years.

Grease interceptors are also made of durable materials like steel, fiberglass and cement, which allow them to withstand the elements. They can be installed outside or in a basement, and they have a much higher capacity than traditional grease traps.

Both types of grease traps have their benefits and drawbacks, but they all help to reduce the amount of FOG that enters the sewer system. While it is essential for all restaurants to have a grease trap or interceptor, the type you choose will depend on your kitchen’s size and production rate.

Why Install a Grease Trap?

Fats, oils and grease (FOG) are one of the leading causes of sanitary sewer overflows in cities across the country. These overflows spill raw sewage on to city streets and sidewalks, into surrounding property and into the environment. By installing a grease trap, you can help to protect your business and the local community.

Generally found in kitchens or near drains, a grease interceptor is designed to capture FOG before it can enter your drainage system or the sewer system. When wastewater makes its way into the interceptor, it is slowed down to give FOG more time to separate from the water. This allows the oil to cool and solidify while the water passes through into a separate compartment where it is caught under baffles. Clear water then escapes through the outlet port.

FOG can clog and block your pipes, causing expensive repairs to your plumbing and disrupting your operations. In addition, a blocked sewage system emits foul odors and can attract pests like rats and cockroaches. By regularly cleaning and maintaining your grease trap, you can mitigate these issues.

A grease trap is an essential part of any restaurant, commercial kitchen or food service business that handles large quantities of cooking oil and grease. They prevent clogs, blockages and overflows and protect the health and safety of staff and customers, as well as limiting the impact on the environment and the local sewer system.

Another benefit of a grease trap is that it can reduce the cost of sewer fees by lowering the amount of wastewater that enters your sewer system. This is because a properly maintained and cleaned grease trap limits the amount of FOG that enters the wastewater system, which helps to keep it flowing smoothly.

A grease trap also helps to make your septic system more efficient, as certain types of grease will harden and can block pipes, which can be costly for you in terms of repair costs and time lost. Grease interceptors are designed to deal with these issues, allowing you to cook and clean as you please without fear of clogs or blockages that can damage your pipes and the surrounding environment.

How Does a Grease Trap Work?

The basic grease trap equipment works by intercepting and separating FOG from wastewater, allowing cleaner water to pass through drainage pipes. This prevents blockages in the internal plumbing system, which can cause costly repairs and downtime for a business. It also protects the local environment and community by preventing the release of FOG into surrounding waterways.

Grease traps typically have a box design, with inner compartments and mechanisms to filter out contaminants. As wastewater enters the trap it slows down, which allows it to cool and separate into 3 layers. The fats and oils, which are less dense than water, rise to the top of the grease trap while the solids settle at the bottom. A series of baffles in the trap help to further slow down the flow and facilitate separation. The separated clear water then escapes through the outlet baffle.

As the trap fills up with cooling grease and solids, it becomes increasingly difficult for wastewater to pass through. This can lead to the build-up of thick layers that can eventually overflow the trap, which is a serious health and safety risk. Eventually, the trap will reach capacity, and the accumulated waste must be removed.

This can be achieved by regularly cleaning and pumping out the trap. The frequency of cleaning will vary depending on the amount of wastewater produced and the size of the trap, but it is recommended that it be cleaned every 2-4 weeks. A biological grease treatment fluid can be added to a trap at the cleaning/pump-out stage to further aid the process by combining non-pathogenic bacteria with nutrients and enzymes to break down FOG, which helps to maintain trap efficiency.

While investing in a suitable grease trap and adhering to best practices for FOG management is a good first step, it is essential that businesses also prioritise regular maintenance and cleaning of the system. Failure to do so can result in costly blockages, negative impacts for the local community and environment, as well as fines for non-compliance with regulations. With proper grease management, however, businesses can minimise these risks and continue to operate efficiently.

How to Maintain a Grease Trap

Located out of sight beneath sinks, the unsung hero that is the grease trap does one of the most important jobs in any commercial kitchen. It keeps harmful substances from clogging sewer lines and prevents costly damage to drains, but it must be properly cleaned to do its job. If not, the resulting sewer backups and fines are no fun for anyone involved.

Properly cleaning a grease trap isn’t difficult, but it does require regular attention. Keeping up with this task will prevent problems like FOG sludge buildup and foul odors, and it also helps keep the drain line running smoothly.

The first step in cleaning a grease trap is to run cool water through the system. This will help control the fats, oils, and grease (FOG) in the trap, making them easier to remove. Next, you’ll need to carefully remove the trap’s lid. This may require a pry bar, wrench or other tool depending on the design of your trap.

Once the trap is open, use a small bucket to remove any standing water from the grease interceptor tank. Then, scoop the waste into a watertight container such as a trash can or heavy-duty plastic bag. Be sure to dispose of the waste properly in compliance with local regulations.

Finally, use a steel pot scrubber and dish soap to clean the inside of the trap. Scrub the walls, baffles, and lid thoroughly to remove any adhered grease. Be careful not to damage the tank or the gasket, as this could cause leaks and/or require replacement parts. Rinse the tank and scrubber with clean water after each use.

While it is possible for restaurants to maintain their own grease traps, it’s usually more effective and cost-efficient to hire professional services. A licensed, reputable company will have the training and tools needed to clean a grease trap correctly and thoroughly. Plus, they’ll be up to date on all local grease trap cleaning laws and regulations. That way, you can be sure your trap is always in compliance and working well.